28 February 2014

Return of the Revenge of the Polar Vortex

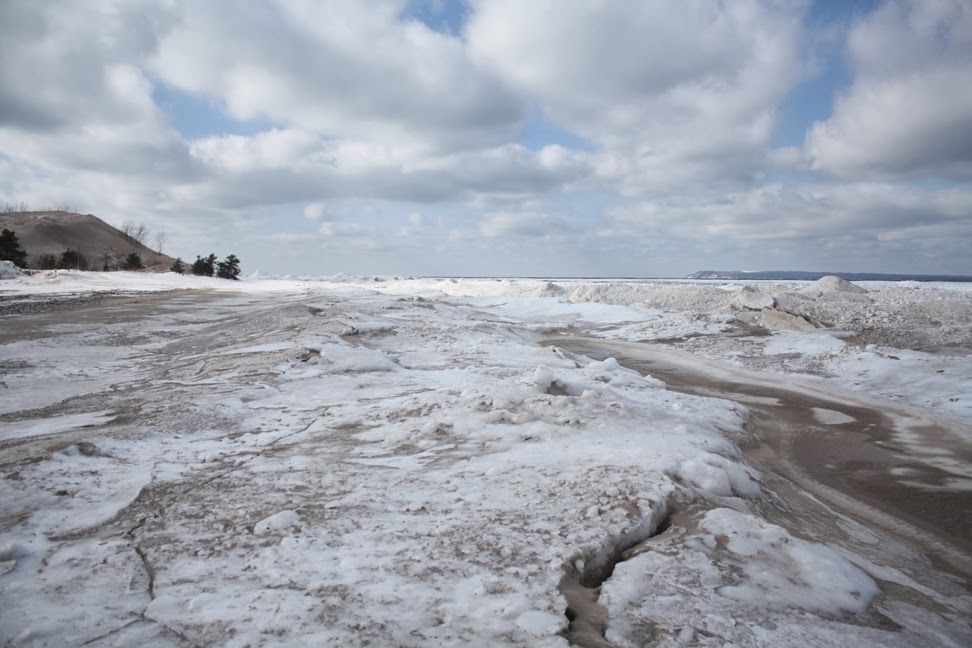
February is such a short month.  And yet, it feels like it's been such a long time since my last goals post - for instance, snow sculpture seems like forever ago!  Probably because I stayed pretty busy this month.  We've been to Sleeping Bear Dunes in the summer - this year we decided to try it out in the winter!  The wind and cold were brutal, but the photos are unbeatable.
But hey, let's whip through those goals:
  • Get the photobook ordered.  Done and done!  And it should arrive today!
  • Go through my clothing and get rid of the stuff I don't wear. Um yeah.  I'm sure you saw this coming - didn't happen.
  • Win first place with our snow sculpture.  We're so good, we got first AND second place! 
  • Bottle the peach wine.  Okay, so this isn't exactly done, but I have it stabilized and backsweetened so it's ready to go.  
  • Make a nice warming soup to survive the revenge of the polar vortex.  Check out this Szechuan hot and sour soup - it's sure to warm you right up.
Okay!  So let's make some March goals:
  • I've got two books I want to read - I'm hoping to get through them in March.
  • In honor of this week's Return of the Revenge of the Polar Vortex (sounds like a bad Syfy remake...) I've got another tasty soup recipe!
  • Plan out my garden!  I'm a little behind on this game - gotta get those peppers started!
  • Quick jaunt down to Indiana - as long as the weather doesn't interfere, we've got a quick family trip planned.  I hear the menu is Mexican!
  • I started doing Jillian Michaels 30 Day Shred and I am SO sore.  I'm hoping to work my way through levels 2 and 3 this month.
Goals out of the way, let's get to the photos!  Let's start with the sculpture.  It's still standing and I have a feeling it will be up until April or May.
Kyle and I went for a walk on one of the sunny days this month and I snapped this shot with my cell.
And while we were out for a walk, we were stopped by a photographer for the local newspaper.  This is what we get for going outside on the first sunny day in a long time.
In case you missed it, I made some awesome cupcakes for my friends gender-reveal party.
As a Christmas present from my parents, the whole family went to see a hockey game and partake in some fun post-game activities.
So that brings us to SBD.
The landscape looked and felt like Mars - barren, hostile, unforgiving.
The ice shelf was a testament to how violently the waves are driven into the shore.
At the same time, the formations were phenomenal, and the waves breaking inside the ice caves were amazing to watch.
The sun peeked out from the clouds occasionally, but there was nothing warm about it.  However, it really brought out the color of the water.
All in all, it was a wonderful trip that I hope to never do again - at least not when it's that cold and that windy.

Update:  stupid polar vortex...

07 February 2014

Szechuan Hot and Sour Soup

The crappy roads and car-scraping every morning are getting old.  In an act of desperation, I started searching for a good winter soup.  I don't typically go for Asian dishes, although I've been trying more and more.  After reading the ingredients to this soup I decided to try it.  If winter is getting you down, this soup will definitely warm you up!
A wonderful collection of veggies, mushrooms and chicken, this soup is spicy and tangy.  So...hot and sour.  Just like the name says.  Go figure.  It has a lot of ingredients, but the majority of them are kitchen staples.
This was the first time I've ever added an egg to soup.  Is there a trick to it?  Do you need to wait a bit before you start stirring?  Is stirring vigorously not the right way to go?  I think I overblended it, and the egg is really shredded.
Hot and Sour Szechuan Soup (adapted from this)
Ingredients:
  • 2 tbs coconut oil
  • 1 c mushrooms, chopped
  • 2 green chilis, chopped
  • 1 red pepper, chopped
  • 1 c. carrots, chopped
  • 8 c. chicken stock
  • 3 c. cooked chicken, cubed
  • 1/2 c. bamboo shoots, julienned
  • 4 tbs soy sauce
  • 2 tbs chili sauce (I used chili paste - nearly the same thing)
  • 2 tsp hot sauce
  • 4 tbs vinegar
  • 1 tsp sugar
  • Salt to taste
  • 1/2 tsp white pepper
  • 4 tbs cornstarch
  • 2 eggs, beaten
  • 1/2 c. green onion, chopped
  • 1/2 c. cilantro, chopped
Instructions:
1.  Heat the coconut oil and saute the mushrooms, chilis, pepper, and carrots until the mushrooms have shrunk.  Add the stock, the chicken and bamboo shoots and heat up.  Simmer for ten minutes
2.  Add the soy sauce, chili sauce, hot sauce, vinegar, sugar, salt and pepper.  Simmer for five minutes.
3.  Mix the cornstarch with 4 tbs of water.  Pour mixture into soup and stir well.  Stir in the eggs.
4.  Garnish generously with green onion and cilantro.
And now for a continuation of last week's saga!  The finished product: a snow mitten, also known as FIRST PLACE!
The "paint" (food coloring and water, applied via spray bottle) turned out really well - it stayed pretty bright for the first couple days after we applied it.  On day 2, the sun even came out!
And here are the artists posing with their sculpture.  Not that you can tell who any of them are due to bundling up against the bitter coldness.
On the last day for registration, there were only two sculptures signed up - but they were offering three prizes!  Figuring we were going to be out in the cold anyway, we signed up for a second sculpture.  It's a (semi-)functioning skee-ball game.  Second place!
And here's third place.  It's an Easter basket, with food-coloring-frozen-water-balloon eggs.  It was pretty awesome before it snowed and kind of filled in the basket.
After a week in the snow, some spicy warm soup was exactly what I needed.  Give it a try! 

31 January 2014

Smitten with the Mitten

...aka January Goals.  The first couple weeks of January were frigid, and I was really feeling the inactivity.  So the second half of January brought some hard labor outdoors - regardless of temperature!  The biggest accomplishment?  A snow sculpture!  A local photographer (Phil Stagg) captured this shot before we hard started doing any carving.
Here's the middle stages - we started carving, but didn't have a ladder.  It's Michigan!  We're participating in the NASF Snow Sculpture contest.  Check out our entry in the park, right by the parking lot across the street from the Consumer's building in Cadillac. :)

So let's get into it.
  • Get back on track with healthy eating and working out.  I did this!  Maybe not as healthy as I was last November, but I've been getting my workouts in, either weightlifting or outdoor (!) activities.
  • Breakfast recipes!  Check 'em out:  homemade protein bars and hashbrown quiche.
  • Birthday!  Pics below.  We went to Short's Brewery and enjoyed some music by The Accidentals.  Check out both - highly recommended!
  • Go through my closet and get rid of clothes I don’t wear anymore.  Well...this one is still on the list.  Oops.
  •  Make a photobook.  I am 95% done with it.  95%!  So that's close.  I just got to the point where I needed to take a break from it and come back with a fresh perspective.
Look!  It's a crappy photo of the The Accidentals!  And my brother's doppelganger.
It occurs to me that I need to pick some goals for February.  Truth be told, I am EXHAUSTED from some long days at work + working on snow sculpture.  So these are going to be non-goals.
  • Get the photobook ordered.  Only 5% to go.
  • Go through my clothing and get rid of the stuff I don't wear.  Yeah, it's still on the list.  
  • Win first place with our snow sculpture.  The competition's pretty weak at this point so I'm getting a little arrogant.
  • Bottle the peach wine.
  • Make a nice warming soup to survive the revenge of the polar vortex.
So I hardly took any photos in December, and I made sure to take extra this month.  So prepare to be bombarded, starting with my birthday flight at Short's.
A big thing we did this month was going snowshoeing with some friends!  It's always hard to convince myself to go outside when temps are this low, but it was a nice sunny day and by the end of the walk I was even shedding some layers!
We left some cool snowshoe prints, and even scared up a few deer (they are dead center in the photo below - very small and far away though).
And...whatever, one more snowshoeing photo - one with actual people!
Here's an action shot from our snow sculpture.  Just so you have an inkling of how much work it is.
Okay, I think that's all I've got.  Sorry about all the cellphone shots, I actually have some good ones on my camera but I have been so busy trying to keep warm that I haven't had time to get photos from my camera.  Happy Friday!  (for more on the mitten, click here)

24 January 2014

Guest Kitchen: Skillet Cornbread with Chilis

I took my ingredients on the road this month!  What's the occasion?  A birthday / chili cook-off extravaganza.  It's possible I took the easy way out by making some cornbread instead of chili, but there was plenty of chili to go around.  Five chilis, three cornbreads, and lots of socialization.  Throw in a few birthday presents and some wine and it's a party!
I added some peppers to this one - canned chilis and rehydrated pasilla peppers.  If you want to add peppers, start here because the chilis need to drain!  Otherwise, start out with the dry ingredients:  flour, cornmeal, sugar, baking powder, baking soda and salt.
Mix in the egg and buttermilk.
Add in the peppers.
Melt the butter in the skillet.  This can be done in the preheated oven or over the stove.  Pour in the batter and then put the skillet in the oven.  Isn't cast iron great?
Except maybe this is an unfamiliar oven and maybe things aren't happening quite as planned.
Twenty minutes later, beautiful cornbread!
Here's my take on the whole pepper thing:  if you want some heat, then add fresh hot peppers.  Canned chilis didn't really do much for the heat factor of this cornbread.
Skillet Cornbread (based on this recipe)
Ingredients:
  • 1/2 c. diced canned green chilis
  • 1 1/4 c. cornmeal
  • 1 1/4 c. flour
  • 2 tbs sugar
  • 1 1/2 tsp baking powder
  • 1/2 tsp baking soda
  • 1 1/4 tsp salt
  • 1 3/4 c. buttermilk*
  • 1 egg
  • 3 tbs butter
Instructions:
1.  Preheat the oven to 425 degrees F.   Drain the chilis and put them in a bowl lined with paper towel to remove excess moisture.
2.  Mix all the dry ingredients.  Stir in the buttermilk and egg.  Add the chilis and stir until well mixed.
3.  Put the butter in a 10" skillet and set it in the oven for a couple minutes to melt the butter.  Remove the skillet from the oven and swirl around the butter to coat the pan.  Pour in the cornbread batter.
4.  Put the skillet in the oven and bake for 20 to 25 minutes.  Serve warm.

*No buttermilk on hand?  Me neither.  Instead, you can make your own by adding 1 tbs vinegar per each cup of milk.  In this case, I would pour 1 3/4 cups of milk into a measuring cup, then add 1 tbs + 2 tsp of vinegar.  Stir it and let it stand for at least 1 minute.
This cornbread is best warm.  It's a little on the drier side, which makes it a great cornbread to eat with chili.  And it glides out of the skillet without any sticking at all.  Fantastic.