I've already blogged about a paleo chocolate chip cookie recipe, but these are completely different. The first recipe was made with coconut flour, this one is made with nut flours.
The first nut is the pecan. Food-processed to a flour-like consistency (I didn't process them nearly enough).
The next nut is the almond. I used almond flour that I had left over from making almond milk.
The real reason I wanted to try this recipe was because it has no sugar in it. It uses stevia (which I am still trying to get used to - it's got some bitterness). The chocolate also adds sweetness.
I hardly ever make cookies. I'm still trying to figure out how to forecast how much flattening paleo cookies do. Usually it's not much.
I do most of my blog food making on Sunday, because there's actually some decent light coming in for photography.
Baked for 12 minutes, it's hard to resist a cookie fresh out of the oven.
These cookies did not do any flattening.
These cookies were way crumbly. I think it would have helped if I'd processed the pecans more. Anyway, if you really want to try it, the recipe is here. I still haven't found any paleo dessert that I've liked more than the Double Chocolate Orange Torte, although if I feel like putting some effort into it, the Chocolate-Orange Cake Roll was really awesome too (and was even better using mint extract in place of the orange).
26 April 2013
19 April 2013
Paleo Pizza (with lots of cheese)
I have finally found a paleo-friendly pizza crust recipe (albeit full of cheese, but most of them are). This crust is strong enough to hold in your hand like a regular pizza, and virtually carb-free.
Okay, stay with me on this one - this is going to be a stretch - but the crust is basically made out of mozzarella, cream cheese, eggs and ground up pork rinds.
Yes. Pork rinds.
I have never eaten a pork rind before. I was determined to try one before making this crust, but when I opened the bag, the smell was just too...vile. I couldn't do it. Luckily, there isn't much pork rind flavor in the final product. This pizza was delicious.
I tried putting the pork rinds in the food processor and I also tried just crushing them by hand. They started to clump up in the food processor, but since that creates a finer grain, that would be my final suggestion. Start out by mixing up eggs, cream cheese, mozzarella and spices.
Add the pork rinds last. The mixture gets thick and creamy. Spread it out over a very well-greased pan (I used liberal amounts of bacon grease).
Bake the crust for 20 minutes at 425*.
While that's in the oven, chop up your pizza toppings.
The more the merrier! After the crust comes out of the oven, top with pizza sauce (beware of store-bought pizza sauces, which are full of sugar). Then add meat and veggies.
And of course, more cheese never hurt anyone. Plus it helps hold the toppings together.
Bake for 10-12 minutes until the cheese is bubbly, then let it stand for a few minutes before consuming.
Anyway, try this one out. Let me know if you like it. It's gluten-free, nut-free, coconut-free, etc, which makes it pretty friendly to a lot of different sensitivities.
Okay, stay with me on this one - this is going to be a stretch - but the crust is basically made out of mozzarella, cream cheese, eggs and ground up pork rinds.
Yes. Pork rinds.
I have never eaten a pork rind before. I was determined to try one before making this crust, but when I opened the bag, the smell was just too...vile. I couldn't do it. Luckily, there isn't much pork rind flavor in the final product. This pizza was delicious.
I tried putting the pork rinds in the food processor and I also tried just crushing them by hand. They started to clump up in the food processor, but since that creates a finer grain, that would be my final suggestion. Start out by mixing up eggs, cream cheese, mozzarella and spices.
Add the pork rinds last. The mixture gets thick and creamy. Spread it out over a very well-greased pan (I used liberal amounts of bacon grease).
Bake the crust for 20 minutes at 425*.
While that's in the oven, chop up your pizza toppings.
The more the merrier! After the crust comes out of the oven, top with pizza sauce (beware of store-bought pizza sauces, which are full of sugar). Then add meat and veggies.
And of course, more cheese never hurt anyone. Plus it helps hold the toppings together.
Bake for 10-12 minutes until the cheese is bubbly, then let it stand for a few minutes before consuming.
Pork Rind Pizza Crust (I followed the recipe here pretty closely)
Ingredients:
- 8 oz cream cheese, softened
- 4 eggs
- 2 cups mozzarella cheese, shredded
- 1 tbs dried oregano
- 1 tbs dried basil
- 1/2 tbs ground garlic
- 1 c. ground up pork rinds (about half a 1.75 oz bag)
Instructions:
1. Preheat the oven to 425*F.
2. Mix up the cheeses, eggs, and spices. Add the ground pork rinds.
3. Heavily grease a 9x13 pan. Spread the dough out in the pan. Bake at 425 for 20 minutes, then remove from oven and let stand for a few minutes.
4. Top with pizza toppings of your choice. Bake for 10-12 more minutes until cheese is bubbly. Let stand for a few minutes before serving.
The crust is surprisingly airy but strong enough to hold in your hand like a "normal" pizza. I am happy enough with this recipe to call it my go-to paleo pizza recipe. It has a ton of cheese in it, but it's definitely the best alternative I've tried so far. (previous attempts: Paleo Cauliflower Pizza Crust, "meatza" - made with a flattened chicken breast as the "crust." Apparently I never actually blogged about that one.)Anyway, try this one out. Let me know if you like it. It's gluten-free, nut-free, coconut-free, etc, which makes it pretty friendly to a lot of different sensitivities.
13 April 2013
Whiskey Gingers + Candied Ginger Root
I have never liked ginger ale. But when I chanced upon the phrase "Whiskey Ginger," I felt a connection. What if, just what if, there was more to this story than just store-bought ginger ale? My local grocery has started stocking ginger root within the past year. It was time to add a new favorite drink to my repertoire.
Start with ginger. It's an oddly shaped, stringy root. Usually by the time they hit the store they've been well-cleaned (maybe even too well-cleaned...).
The recipe calls for 2 cups of fresh ginger. The root I bought was .75 lbs and ended up being just over 2 cups (skinned and sliced). A vegetable peeler worked really well to skin it, then I just sliced it with a knife. A mandolin would also be appropriate if you're looking for thin, uniform slices.
Bring two cups of sugar and one cup of water to a boil. As soon as it starts to boil, add the sliced ginger. Simmer for 45 minutes, stirring occasionally. Let it cool a bit, then strain the ginger slices out of the syrup.
Rinse the ginger root slices in water, then pat dry. Toss them with sugar and lay them out on wax paper for about 24 hours (depending on slice thickness).
The candied ginger root is very strong, and I recommend nibbling a small piece at first so that you know what you're up against. It's spicy, sort of the way cinnamon candies can be hot and spicy.
On to the drink portion of this week's post!
The fun part.... Add 1 shot of whiskey and 2 (large) tablespoons of ginger syrup to a glass.
Add about one cup of club soda (sparkling water). Stir to combine. Garnish with a piece of candied ginger.
It tastes like summer...and almost makes up for the fact that all the snow here melted, and today it's all back again. This drink is good enough that I would drink it WITHOUT the whiskey. Then it's just homemade ginger ale - no HFCS, no aspartame, no chemicals. Just ginger, sugar, and sparkling water.
Candied Ginger Root + Whiskey Gingers (inspired by this)
Ingredients:
1. Bring 1 cup of water and 2 cups of sugar to a boil. Just as it starts to boil, add the ginger root. Simmer for 45 minutes, stirring occasionally. Let cool.
2. Drain off the syrup and reserve for later. Rinse the ginger root in water then pat dry. Toss with half a cup of sugar until well-coated. Lay the candied ginger pieces out on waxed paper for 24 hours to dry.
3. Make the drinks: for each drink, use 2 large tablespoons of syrup, 1 shot of whiskey, and 1 cup of sparkling water.
4. Keep remaining syrup refrigerated.
This is the perfect drink for a hot summer day...or even a cold winter day when you need to be reminded of what summer is like.
Start with ginger. It's an oddly shaped, stringy root. Usually by the time they hit the store they've been well-cleaned (maybe even too well-cleaned...).
The recipe calls for 2 cups of fresh ginger. The root I bought was .75 lbs and ended up being just over 2 cups (skinned and sliced). A vegetable peeler worked really well to skin it, then I just sliced it with a knife. A mandolin would also be appropriate if you're looking for thin, uniform slices.
Bring two cups of sugar and one cup of water to a boil. As soon as it starts to boil, add the sliced ginger. Simmer for 45 minutes, stirring occasionally. Let it cool a bit, then strain the ginger slices out of the syrup.
Rinse the ginger root slices in water, then pat dry. Toss them with sugar and lay them out on wax paper for about 24 hours (depending on slice thickness).
On to the drink portion of this week's post!
The fun part.... Add 1 shot of whiskey and 2 (large) tablespoons of ginger syrup to a glass.
Add about one cup of club soda (sparkling water). Stir to combine. Garnish with a piece of candied ginger.
Candied Ginger Root + Whiskey Gingers (inspired by this)
Ingredients:
- 2 cups skinned, sliced ginger root (roughly .75 lbs whole ginger root)
- 2 cups + .5 cups sugar (I used raw, which made my syrup darker)
- 1 cup water
- 2 shots whiskey
- 2 cups sparkling water
1. Bring 1 cup of water and 2 cups of sugar to a boil. Just as it starts to boil, add the ginger root. Simmer for 45 minutes, stirring occasionally. Let cool.
2. Drain off the syrup and reserve for later. Rinse the ginger root in water then pat dry. Toss with half a cup of sugar until well-coated. Lay the candied ginger pieces out on waxed paper for 24 hours to dry.
3. Make the drinks: for each drink, use 2 large tablespoons of syrup, 1 shot of whiskey, and 1 cup of sparkling water.
4. Keep remaining syrup refrigerated.
This is the perfect drink for a hot summer day...or even a cold winter day when you need to be reminded of what summer is like.
05 April 2013
April's Wild Ride
Sometimes everything just seems to converge.
Last weekend, I was supposed to go dress shopping with my mom. She canceled because she ended up having to go to a funeral. Then my car crapped out. Then I discovered my credit card was missing. Then my neighbor went crazy - literally - and had to be taken away in an ambulance (she's very sweet and elderly). Charter double-charged me for a double-bill this month.
March! The only thing on my goals list for March was taxes. Also worth noting was the mad chicken-roasting and broth-making tips I bestowed upon the internet this month.
My taxes are done. That also required several hours of trying to use online help and finally contacting customer service on an e-file site I plan on never using again.
One of my best friends amazingly had a free Saturday and went shopping with me - she even drove! My car was just low on coolant, as far as I can tell it's not leaking, which makes it a MUCH easier problem to handle. My credit card (you'll never believe this) was found in a gas station parking lot and brought to the cashier, who held it in their safe for a full week until I called them. That was the last place I remembered using the card, but I was pretty sure I couldn't have lost it there. My neighbor...well, still waiting to hear back on that one, but she's had episodes like this before (so I've heard).
I ordered 36 beach balls this week. They are the cheapest beach balls on the internet. I'm going to have a beach party.
Let's talk about April goals.
Last weekend, I was supposed to go dress shopping with my mom. She canceled because she ended up having to go to a funeral. Then my car crapped out. Then I discovered my credit card was missing. Then my neighbor went crazy - literally - and had to be taken away in an ambulance (she's very sweet and elderly). Charter double-charged me for a double-bill this month.
March! The only thing on my goals list for March was taxes. Also worth noting was the mad chicken-roasting and broth-making tips I bestowed upon the internet this month.
My taxes are done. That also required several hours of trying to use online help and finally contacting customer service on an e-file site I plan on never using again.
![]() |
| I know teacup pigs aren't really trendy anymore but I still want one. |
I ordered 36 beach balls this week. They are the cheapest beach balls on the internet. I'm going to have a beach party.
Let's talk about April goals.
- I want to make barefoot sandals for my beach party.
- I'm teaching all my friends a dance routine.
- I'm going to make seed bombs.
- I'm going to start planting my garden!
- This dang lake by my house is going to melt. It's my personal goal.
- I don't think I bottled any wine all March. I think we can all agree that means I am more than behind on my wine bottling.
- Oh yeah, just remembered I'm a bridesmaid in a wedding this month. That seems like something I probably shouldn't forget.
29 March 2013
Buffalo Chicken Soup
Okay, so now that I've roasted a chicken and made some awesome chicken broth, what to do with it? How about turn the world's best Super Bowl dip into a soup!? Brilliant.
I'm not suggesting you make this soup. I'm not even suggesting you read this recipe. This soup has so much hot sauce and so much chicken, you probably can't even handle it. If you need drama, go watch Gypsy Sisters (omg WHY).
For anyone who's still with me, start here: just like the buffalo chicken dip, add hot sauce and cream cheese to a saucepan over medium heat and whisk until the cream cheese is melted.
In a large pot, saute onion, pepper and celery. If you saved some chicken fat from broth-making, this would be a good place to use it. In fact, this would be a good use for all that celery after you put the leaves and heart in with the stock.
Okay, brace yourself for this one. If you roasted a chicken, put ALL of the chicken in the stock pot. Yup. We're putting an entire chicken into this soup.
Now would be a good time to add the hot sauce / cream cheese mixture. Oh, and the entire batch of broth that I just made. You can't even handle this!
Check. This. Soup. Out.
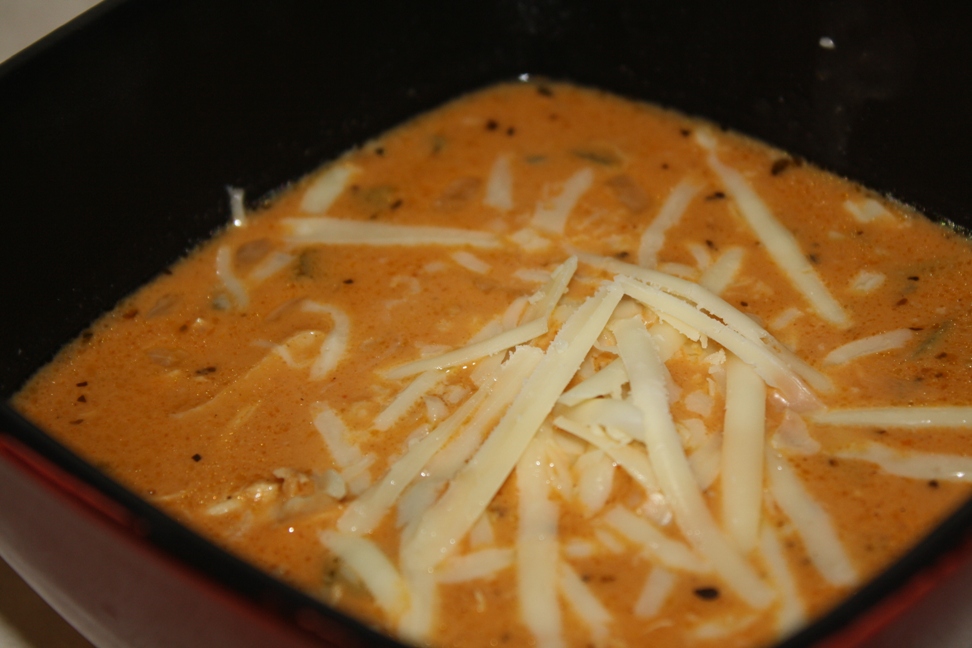
Now, there's a lot going on here already. I don't really think it needs the same level of cheese that the dip does. So you can toss a handful of shredded cheese in there if you want, or you can just use it as a garnish.
Serve with a gallon of water, and a few scoops of ice cream for the truly faint-hearted. Booyah.
Buffalo Chicken Soup
Ingredients:
1. Whisk the hot sauce and cream cheese together over low heat until completely combined.
2. In a soup pot, saute onion, pepper and celery in chicken fat or coconut oil until onions are translucent.
3. Add chicken and hot sauce / cream cheese mixture to soup pot. Add chicken broth to desired soup consistency.
4. Simmer for 20 minutes. Serve garnished with cheese and green onions.
I don't want to say you can't handle it...but I'm pretty sure you can't handle it. At any rate, I like how this nicely ties up the last two posts on roasting chickens and making chicken broth. It's a great way to save money, be more eco-friendly, be healthier (I said healthiER, not healthy...), and use every bit of what you have.
I'm not suggesting you make this soup. I'm not even suggesting you read this recipe. This soup has so much hot sauce and so much chicken, you probably can't even handle it. If you need drama, go watch Gypsy Sisters (omg WHY).
For anyone who's still with me, start here: just like the buffalo chicken dip, add hot sauce and cream cheese to a saucepan over medium heat and whisk until the cream cheese is melted.
In a large pot, saute onion, pepper and celery. If you saved some chicken fat from broth-making, this would be a good place to use it. In fact, this would be a good use for all that celery after you put the leaves and heart in with the stock.
Okay, brace yourself for this one. If you roasted a chicken, put ALL of the chicken in the stock pot. Yup. We're putting an entire chicken into this soup.
Now would be a good time to add the hot sauce / cream cheese mixture. Oh, and the entire batch of broth that I just made. You can't even handle this!
Check. This. Soup. Out.
Now, there's a lot going on here already. I don't really think it needs the same level of cheese that the dip does. So you can toss a handful of shredded cheese in there if you want, or you can just use it as a garnish.
Serve with a gallon of water, and a few scoops of ice cream for the truly faint-hearted. Booyah.
Buffalo Chicken Soup
Ingredients:
- 12 oz hot sauce
- 8 oz cream cheese
- 1 onion, finely chopped
- 1 green pepper, chopped
- 4-5 stalks of celery, chopped
- 3.5 cups of shredded chicken (about one chicken's worth - recipe here)
- Chicken broth (recipe here)
- Cheese and green onions for garnish
1. Whisk the hot sauce and cream cheese together over low heat until completely combined.
2. In a soup pot, saute onion, pepper and celery in chicken fat or coconut oil until onions are translucent.
3. Add chicken and hot sauce / cream cheese mixture to soup pot. Add chicken broth to desired soup consistency.
4. Simmer for 20 minutes. Serve garnished with cheese and green onions.
I don't want to say you can't handle it...but I'm pretty sure you can't handle it. At any rate, I like how this nicely ties up the last two posts on roasting chickens and making chicken broth. It's a great way to save money, be more eco-friendly, be healthier (I said healthiER, not healthy...), and use every bit of what you have.
22 March 2013
Homemade Chicken Broth
So last week, I covered roasting your own chicken. Easy peasy, right? Healthy and delicious. But we want to maximize our return on this chicken. This week, I'm going over what you can do with all the bones and leftovers.
Normally I like to separate the meat out while the chicken is still warm, because I like to make a soup du semaine to eat for lunch every day. If you're pulling meat off as needed, no worries. Just throw the bones in a freezer bag and keep adding them in as they become available. I usually get around 3.5 cups of meat from each bird.
Here's what a cleaned carcass looks like. You can see the wishbone sticking out in front. I know this is a little morbid, but if you eat chicken I think you should know where it comes from.
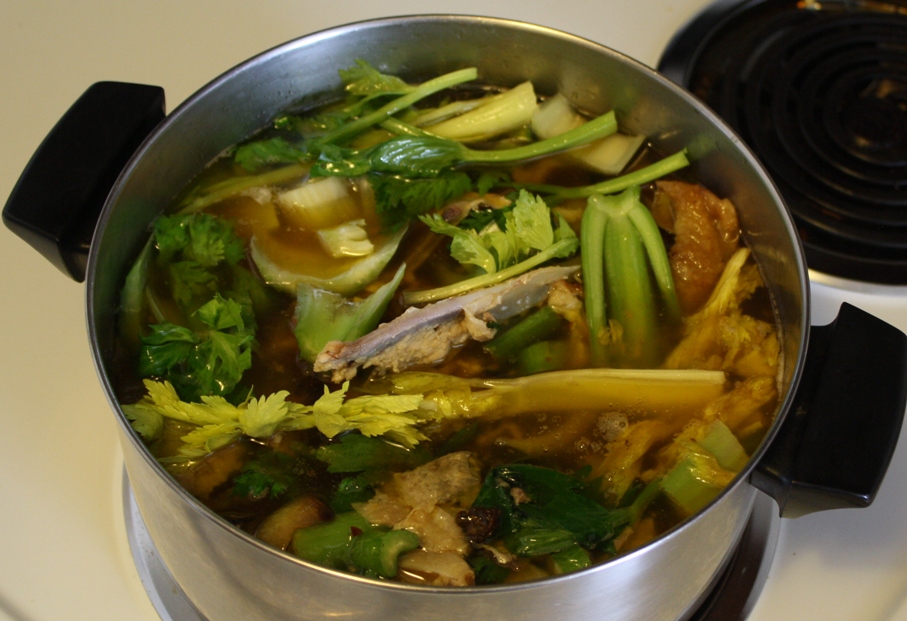
Everything goes in a pot. Bones, neck, organs, skin. All the leftover juices from roasting it. Add water until the carcass is nearly covered.
Best practice: Add an onion, a few carrots, and the celery leaves/heart leftover from cutting up celery.
I usually put it on the stove when I get home from work and let it simmer until near bedtime. So, around 4 hours. There should be no discernible carcass left by then.
I use a pair of tongs to pull out the big pieces, then strain what's left. The broth should have a decent layer of fat on it from the chicken and from the butter.
Let it cool, then refrigerate overnight. The fat all solidifies on top (you can use that for frying, or you can discard it). The broth underneath should be the consistency of jello. This is due to the gelatin in the bones. It's a little weird at first, but I promise it's a good thing. This is the mark of a good broth.
This broth can be used in any recipe that calls for chicken broth. You can dilute it with water or use it straight. You can add a few big spoonfuls of broth jello to a mug of hot water and drink it. As I've said before, bone broth is good for you. Especially if it's coming from free-range and/or grass-fed animals. Usually, I put all of the broth into my weekly soup for a serious flavor-boosted soup, like this split pea soup.
Normally I like to separate the meat out while the chicken is still warm, because I like to make a soup du semaine to eat for lunch every day. If you're pulling meat off as needed, no worries. Just throw the bones in a freezer bag and keep adding them in as they become available. I usually get around 3.5 cups of meat from each bird.
Here's what a cleaned carcass looks like. You can see the wishbone sticking out in front. I know this is a little morbid, but if you eat chicken I think you should know where it comes from.
Everything goes in a pot. Bones, neck, organs, skin. All the leftover juices from roasting it. Add water until the carcass is nearly covered.
Best practice: Add an onion, a few carrots, and the celery leaves/heart leftover from cutting up celery.
I usually put it on the stove when I get home from work and let it simmer until near bedtime. So, around 4 hours. There should be no discernible carcass left by then.
I use a pair of tongs to pull out the big pieces, then strain what's left. The broth should have a decent layer of fat on it from the chicken and from the butter.
Let it cool, then refrigerate overnight. The fat all solidifies on top (you can use that for frying, or you can discard it). The broth underneath should be the consistency of jello. This is due to the gelatin in the bones. It's a little weird at first, but I promise it's a good thing. This is the mark of a good broth.
This broth can be used in any recipe that calls for chicken broth. You can dilute it with water or use it straight. You can add a few big spoonfuls of broth jello to a mug of hot water and drink it. As I've said before, bone broth is good for you. Especially if it's coming from free-range and/or grass-fed animals. Usually, I put all of the broth into my weekly soup for a serious flavor-boosted soup, like this split pea soup.
Subscribe to:
Posts (Atom)